
Part 2: OSPF (IPv4) - Connecting 2 Instances of VyOS and pfSense Together

Introduction
In part 1 of the article, I have covered how to create and configure virtual machines and install both VyOS and pfSense. In part 2 of this article, I'm going to cover how to configure pfSense with OSPF networking. Let's get going, shall we?
Table of Content
- Introduction
- Table of Content
- Prerequisite
- Before We Get Started Configuring pfSense...
- Let's Configure pfSense
- Things to Do Before Configuring OSPF in pfSense
- Install FRR Package in pfSense
- pfSense Firewall
- Now Let's Configure OSPF
- Can Hosts Behind pfSense Ping Other Hosts in Different Networks?
- Network Address Translation (NAT)
- So Now Can Hosts Behind pfSense Ping Other Hosts in Different Networks?
- Conclusion
Prerequisite
You must have created and configured virtual machines, installed VyOS and pfSense, and setup VyOS with OSPF. This article is for the intended audience who have knowledge and good experience with installing operating systems, working with Linux command line, basic networking, and virtual machines. This article is for those who have good computer networking skills such as configure networks and how to segregate networks from each other. Also, it's important to know how subnetting in IPv4 works.
So I'm going to assume you have read part 1 of my two-part article regarding how to get OSPF working between VyOS and pfSense, right? If you have not, please read Part 1: OSPF (IPv4) – Connecting 2 Instances of VyOS and pfSense Together.
Before We Get Started Configuring pfSense...
I'm going to spin up a new virtual machine in my desktop computer. The virtual machine will have a network bridge set to ethbr0_2402. This is what the image looks like as shown below.

For those who have eyesight, in the upper-right hand corner of the screen, you can see a list of bridges I have created. Each bridge has its own VLAN ID. So in my case, ethbr0_2402 has a VLAN ID of 2402. The traffic between the desktop and my server is as follows:
From desktop...
- Signal coming out of virtual machine in my desktop...
- ...goes to
ethbr0_2402, a bridge interface, which goes to... - ...to
ethbr0.2402, a VLAN interface that assigns a VLAN ID tag of 2402, which goes to... - ...
ethbr0, another bridge interface, which carries tagged VLAN traffic to... - ...
enp5s0, a physical network interface that carries tagged VLAN traffic to... - ...an RJ-45 Ethernet cable which carries bits of ones and zeros of VLAN traffic to...
- ...my server, which gets picked up by
enp7s0, which sends tagged VLAN traffic to... - ...
ethbr10, a bridge interface which sends tagged VLAN traffic to... - ...
vlan2402, a VLAN interface which links toethbr10.vlan2402removes the VLAN tag from the signal and then goes to... - ...
ethbr10_2402, a bridged interface which now sends traffic to pfSense VM in my server.
I hope I don't lose everyone. That's why it's important to have a lot of experience in Linux and networking. In order to send traffic back to a desktop VM running in my desktop, you simply reverse the process. Here, let me put it this way:
Desktop } Desktop VM <-> ethbr0_2402 (Bridge) <-> ethbr0.2402 (VLAN) <-> ethbr0 (bridge) <-> enp5s0 (Physical NIC in Desktop) <-> Ethernet Cable <-> enp7s0 (Physical NIC in Server) <-> ethbr10 (Bridge) <-> vlan2402 (VLAN Interface) <-> ethbr10_2402 (Bridge) <-> pfSense VM { Server
If VLANs did not exist, I would have to have 10+ network interface cards or adapters for my desktop and server (that makes 20 total or 2 times the number of network interfaces cards or adapters) and 10+ network cables and that would be a lot of mess to deal with.
And yes, do refer to the scenario and netplan configuration for my server in my first article.
Let's Configure pfSense
A Note About The Quality of Images
Please excuse the quality of images. When I took screenshots using a virtual machine (From the menu: Virtual Machine -> Take screenshot), the images were saved as PNG format (Portable Network Graphics). The PNG format is larger in file size than JPG (jpeg) format and I wanted to do a batch conversion of PNG to JPG all at once. In Linux, that's where mogrify comes in and is included in a package called imagemagick that can be downloaded from the distro repository such as Ubuntu, Debian, Fedora, Arch, OpenSUSE, and many others. I'm not completely sure how to preserve the image quality at 80% while keeping the file size low. Plus, I also used mogrify to batch resize images and store it in a different folder so that files would not be overwritten. I do have GIMP but because I have about 39 images, it can take a lot of time to do repetitive tasks.
- For the first tab, I do Ctrl+Shift+E and change from
.pngto.jpg. - Resize the image (Alt+I, S).
- Do Ctrl+Shift+E again to export the new image inside the thumbnail folder.
- Because I cannot do Ctrl+Tab to get to the next tab, I had to click in the second tab while magnified, because in a 4K screen (3840x2160), the tabs are very small. That's because GIMP is not HIDPI-aware in Linux.
- I then would repeat the same process 38 times until I have gotten all the images converted and resized, making sure that the image quality is at 80%, not 90% by default in GIMP.
I don't know why I cannot do Ctrl+Tab and Ctrl+Shift+Tab for switching between images without using my mouse. This is why I would rather want to do automation using a command line utility whenever possible and that's the reason why I couldn't figure out how to set the quality of images using the mogrify command. So, with a note about image quality out of the way, let's get into configuring pfSense for networking, shall we?
Images for Configuring pfSense


Instructions for Configuring pfSense
Open the web browser for the virtual machine, type the pfSense's internal IP address, and hit Enter.
The virtual machine should have the same VLAN ID as the pfSense's virtual machine for the internal network. in my case, the IP address for the pfSense gateway is
10.249.2.1and the VLAN ID is 2402. Note that you do not choose a VLAN interface when configuring virtual machines, but bridges. The network bridge is what allows virtual machines to share one or more interfaces.- The default username is
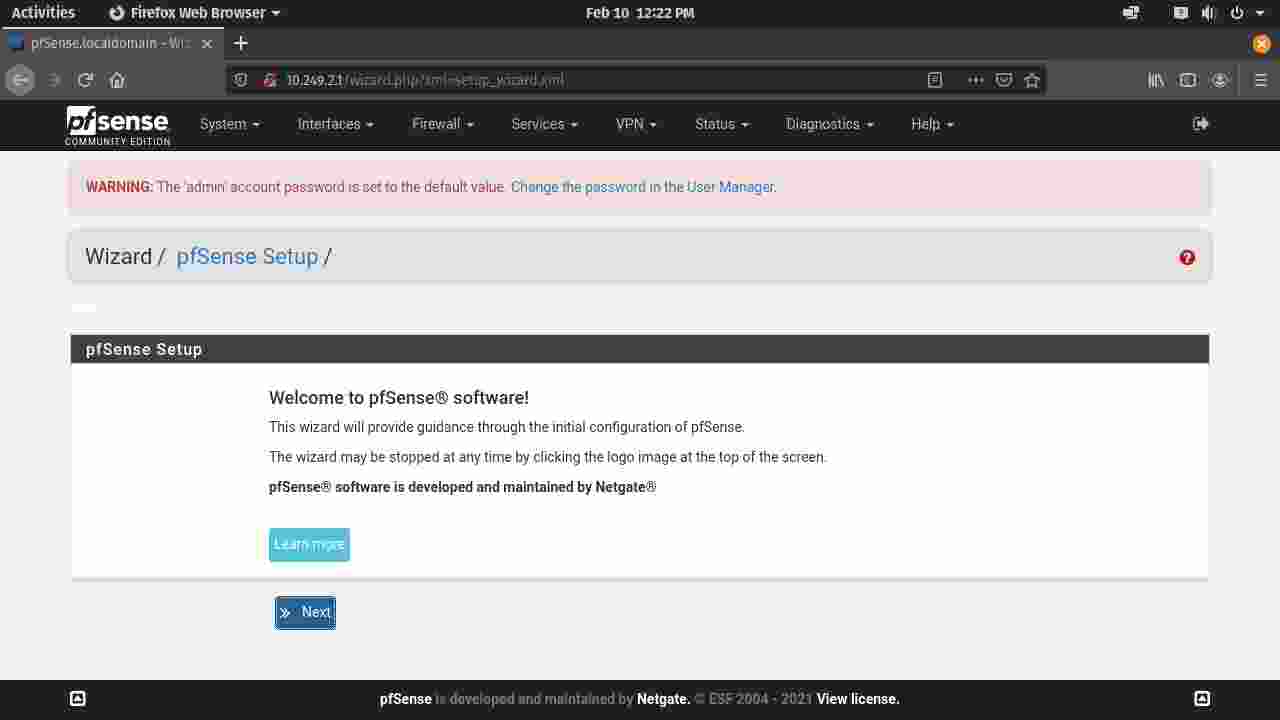
adminand the password ispfsense. Login to pfSense. (Figure 1-0) - The setup wizard begins. Continue to the next step. (Figure 1-1)
- Enter the hostname for pfSense, your domain name (optional; I've chosen
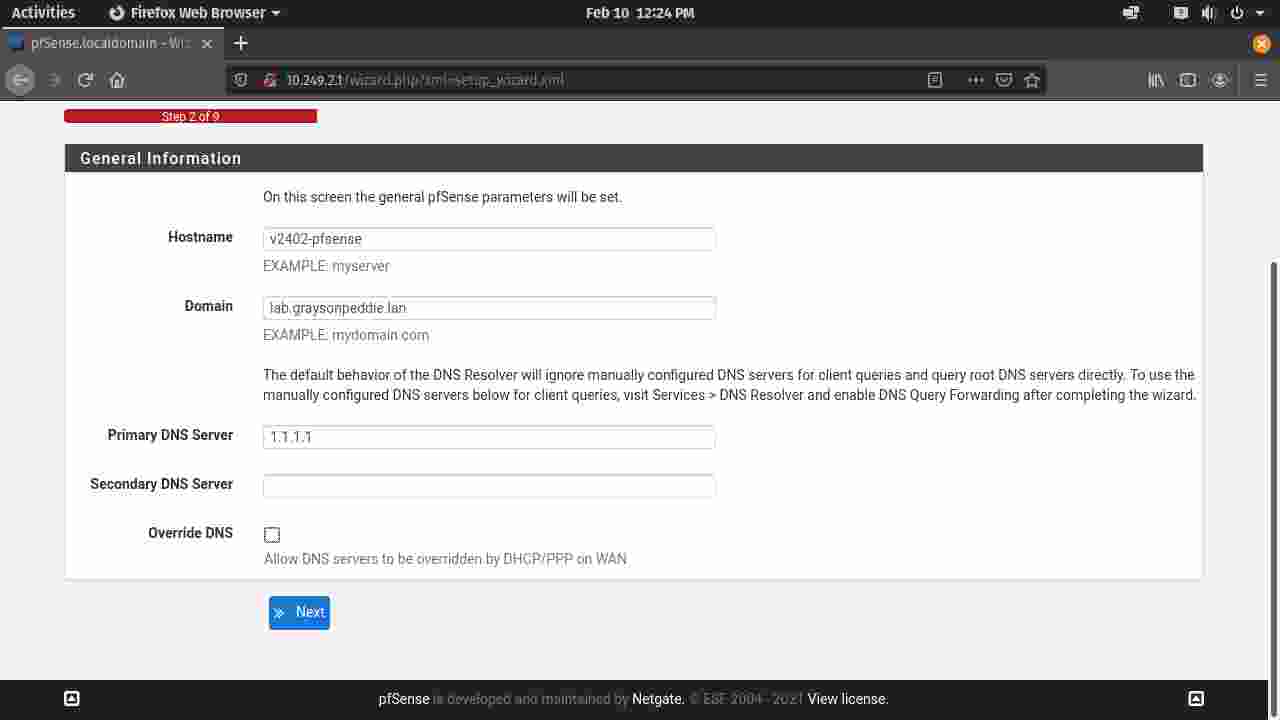
lab.graysonpeddie.lanbecause this is my "virtual homelab"), primary/secondary DNS server (I suggest1.1.1.1and1.0.0.1, but you can pick one such as8.8.8.8or9.9.9.9), and I suggest you uncheck the checkbox for Override DNS. (Figure 1-2) - Leave the NTP (Network Time Protocol) Server as it is, and choose a timezone if you want. (Figure 1-3)
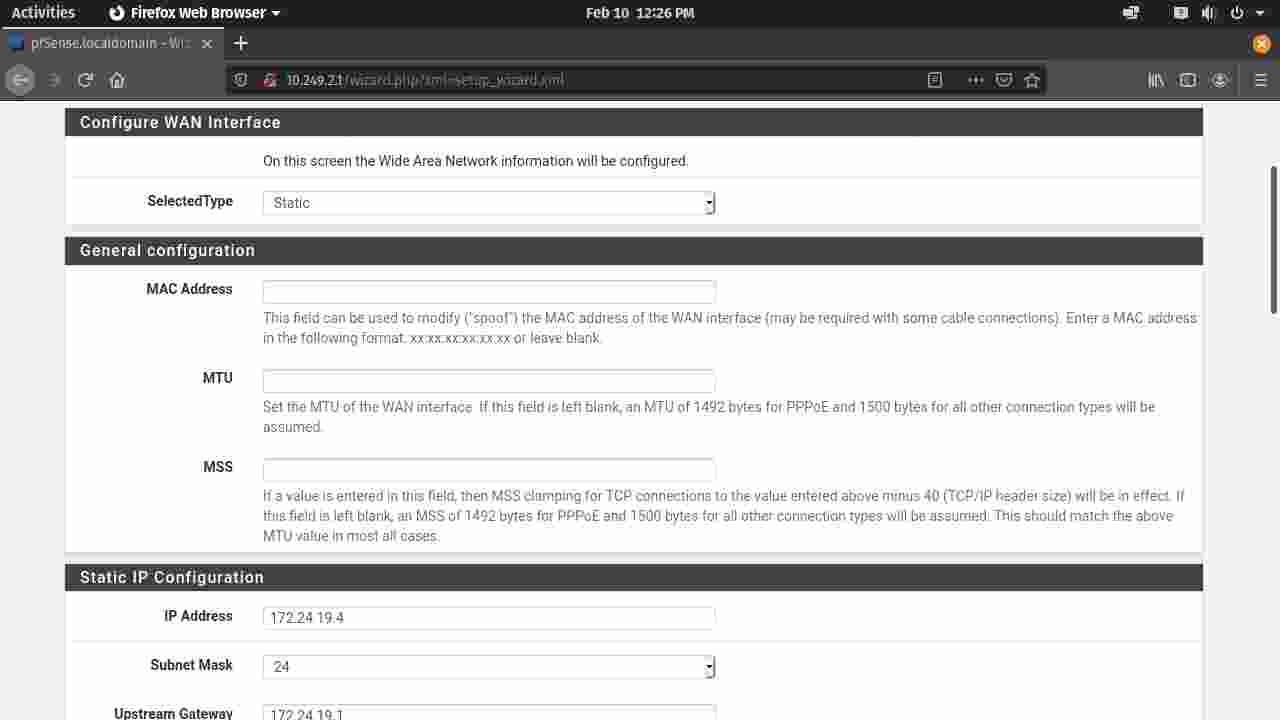
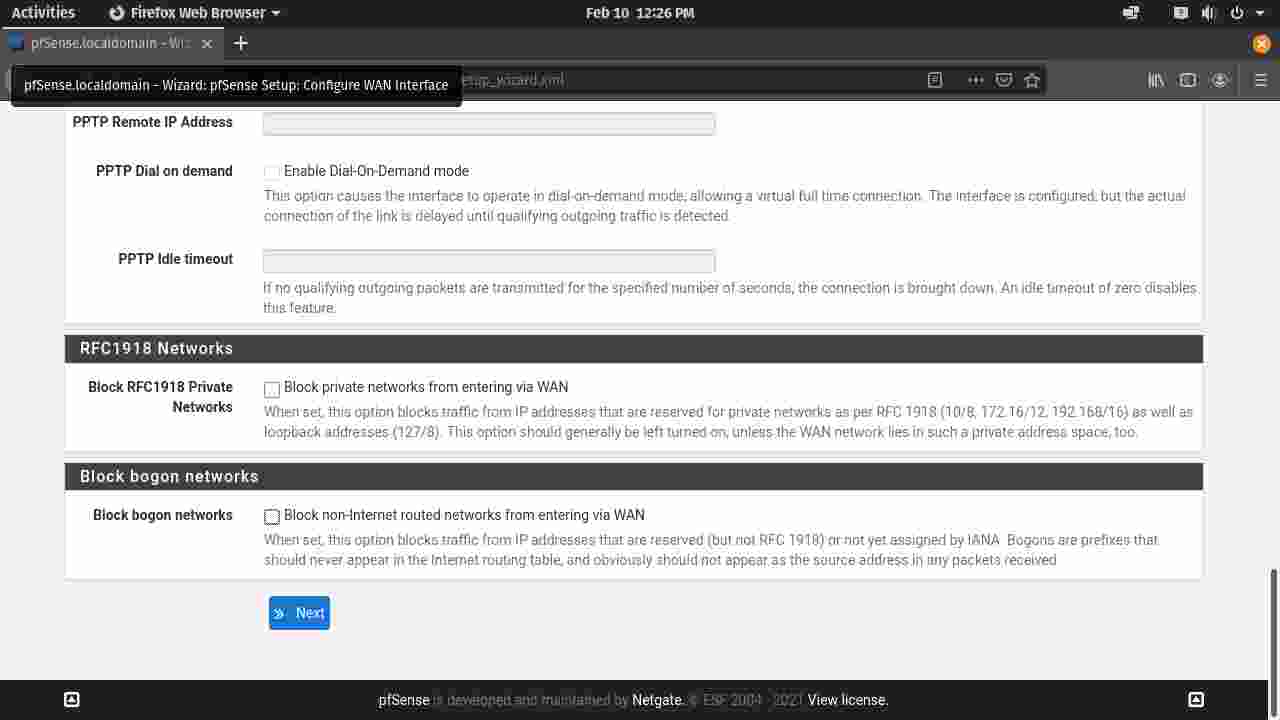
For the next step, leave everything as is, scroll down to the bottom of the page and uncheck the two check boxes for blocking private and bogon networks. These two need to be unchecked for Internet connection to work correctly. Continue to the next step. (Figure 1-4, Figure 1-5)
Note: If you are configuring pfSense and you have a public IP address assigned by your Internet service provider, leave both of them checked.
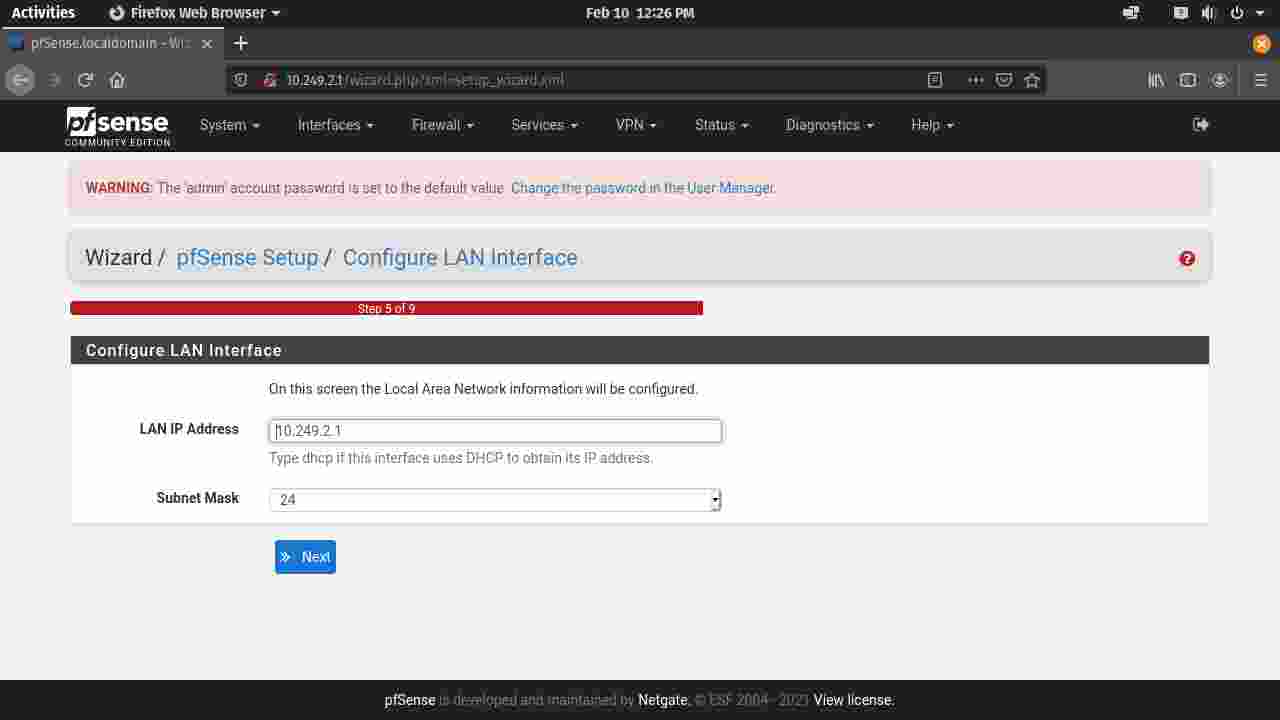
- This step is for configuring a private IP address. Leave it as it is and continue to the next step. (Figure 1-6)
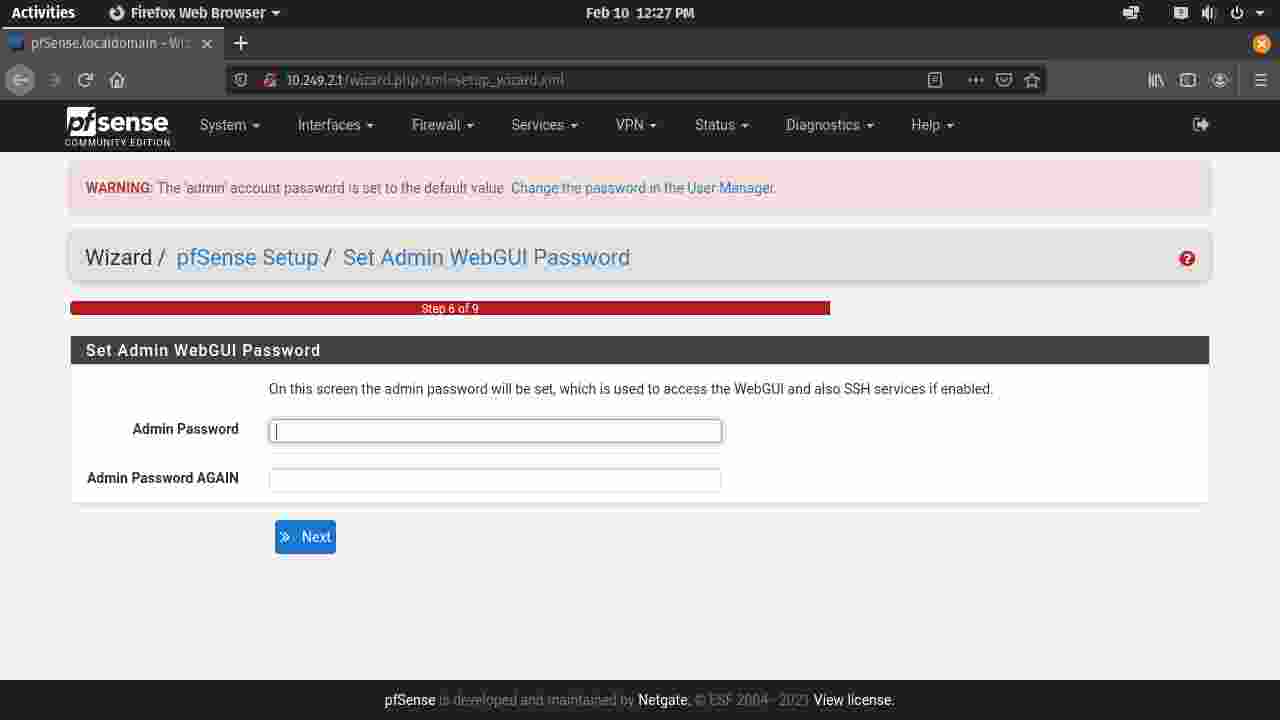
- Choose your own password. Make sure you can remember your password as you'll need it when you log into pfSense. (Figure 1-7)
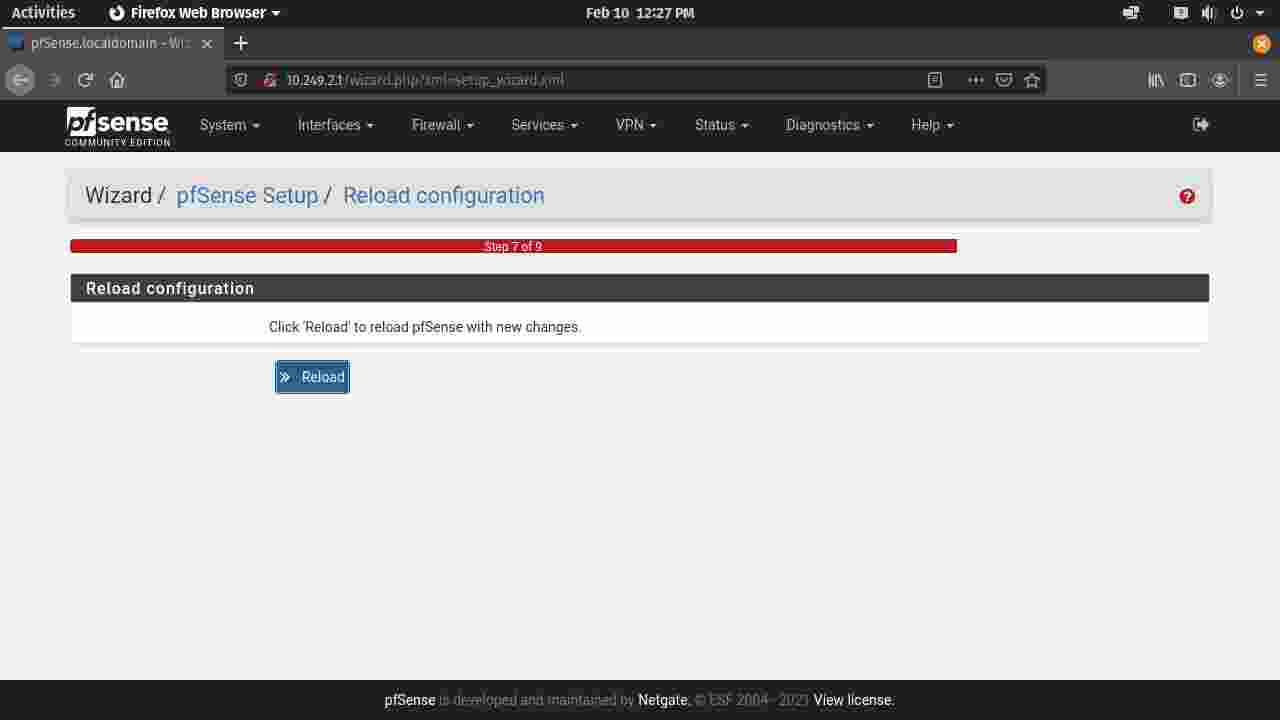
- Click Reload to reload the configuration and click
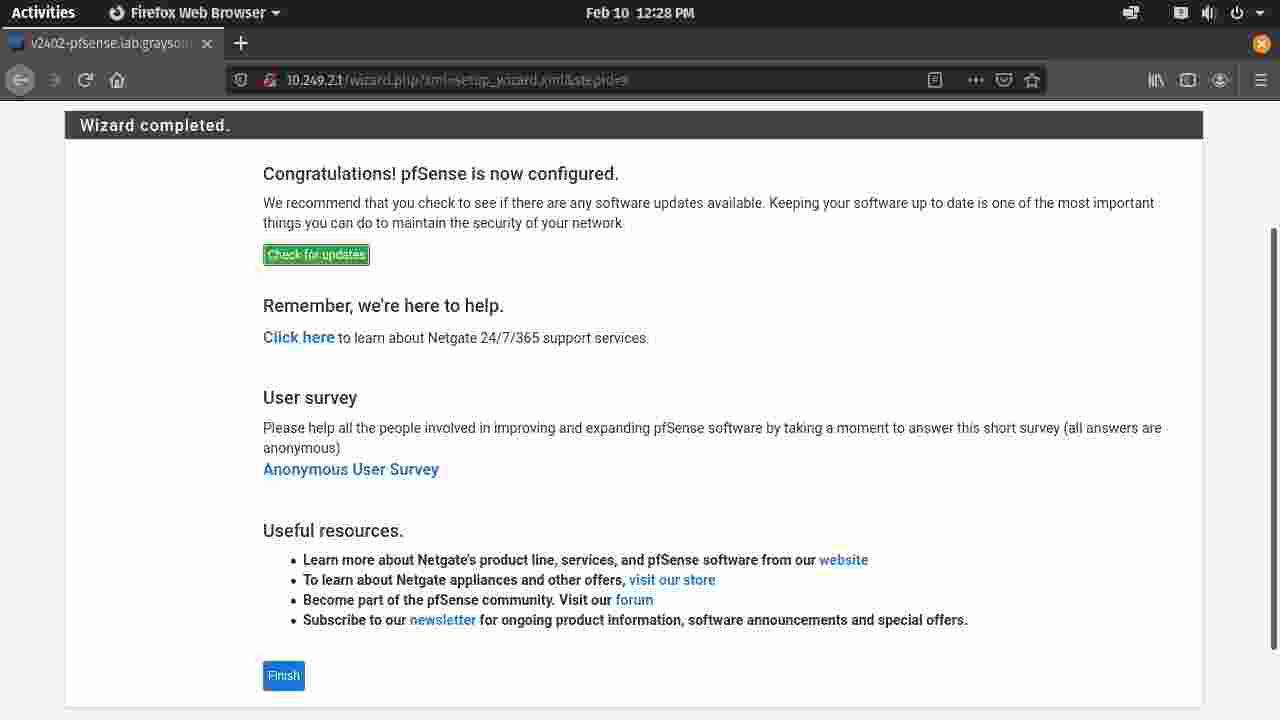
Finishto finish the setup wizard.
Things to Do Before Configuring OSPF in pfSense
Images for Post-Installation Steps and Verifying Internet Connection

Let's Take Care of Things Before Vefifying Internet Connectivity
Skip the steps below if you are configuring pfSense in a real hardware. These steps are for those working in virtual machines.
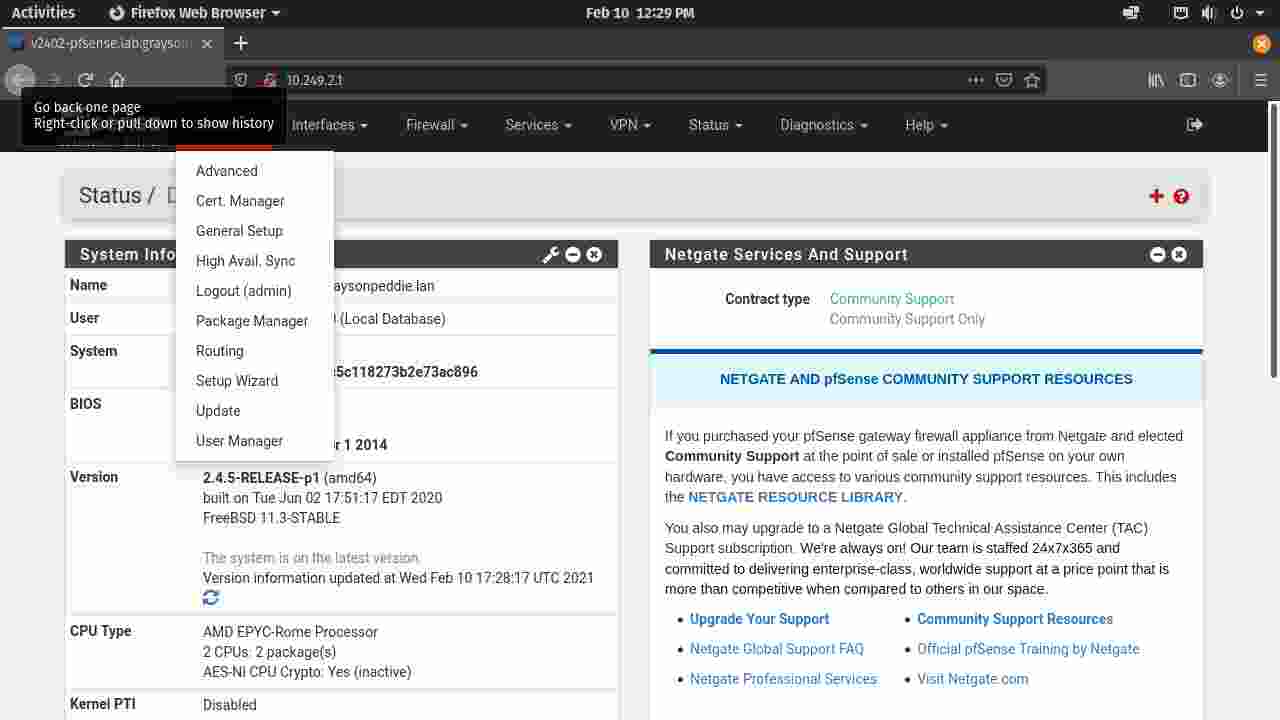
- Open the System menu and click in Advanced. (Figure 1-1)
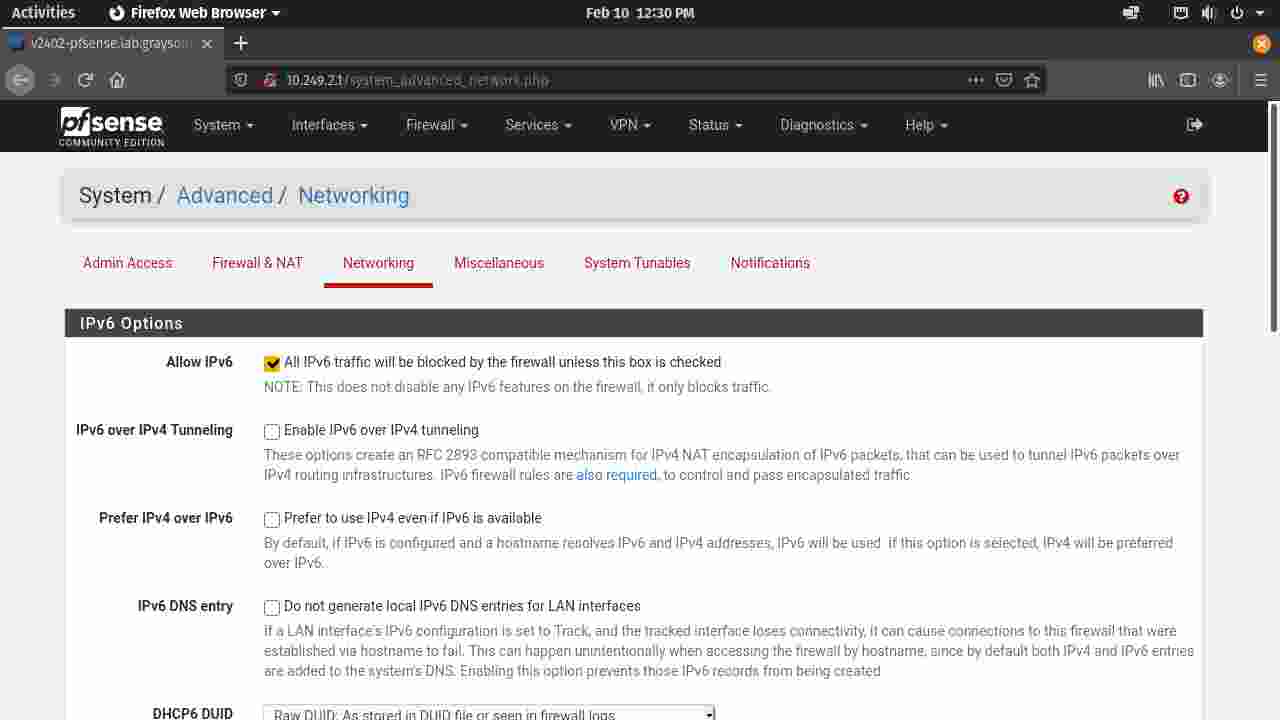
- Go to the Networking section and scroll down to the bottom. (Figure 1-2)
- At the bottom of Networking section, check the checkbox to disable hardware checksum offloading. (Figure 1-3)
Verify that the Internet is working in the internal network. (Figure 1-4)
Install FRR Package in pfSense
Images for Installing FRR Package in pfSense
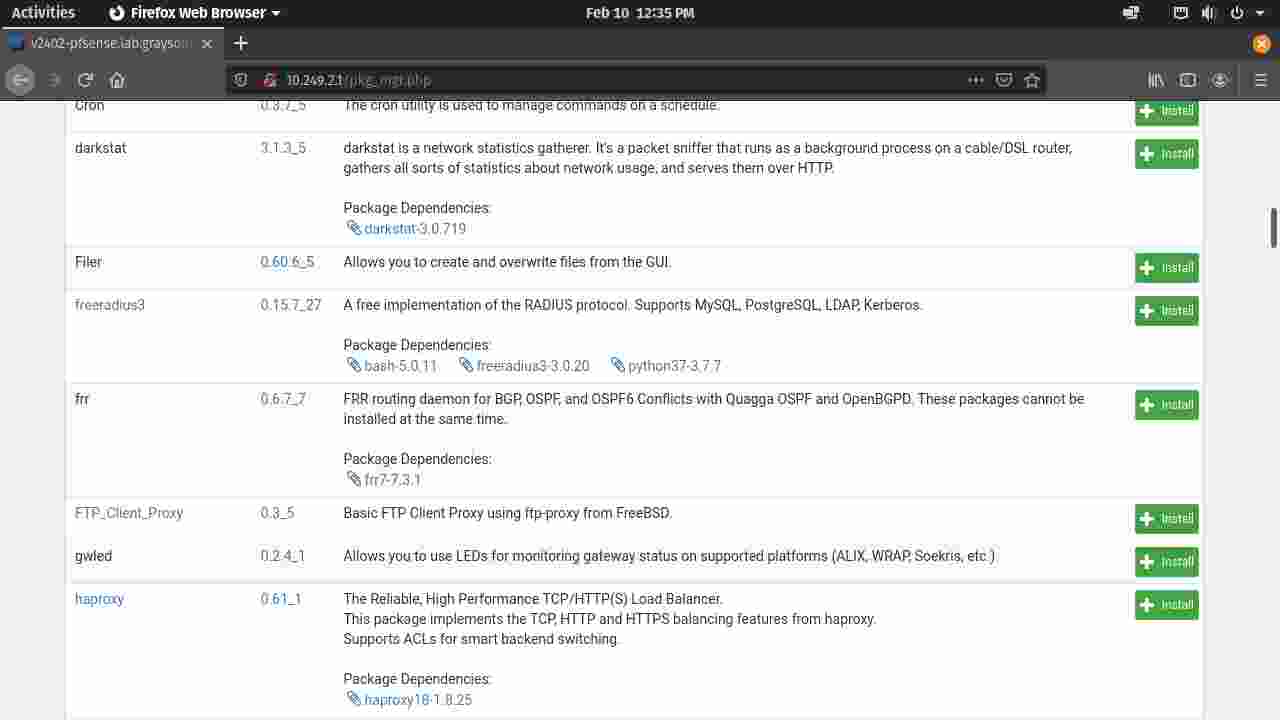
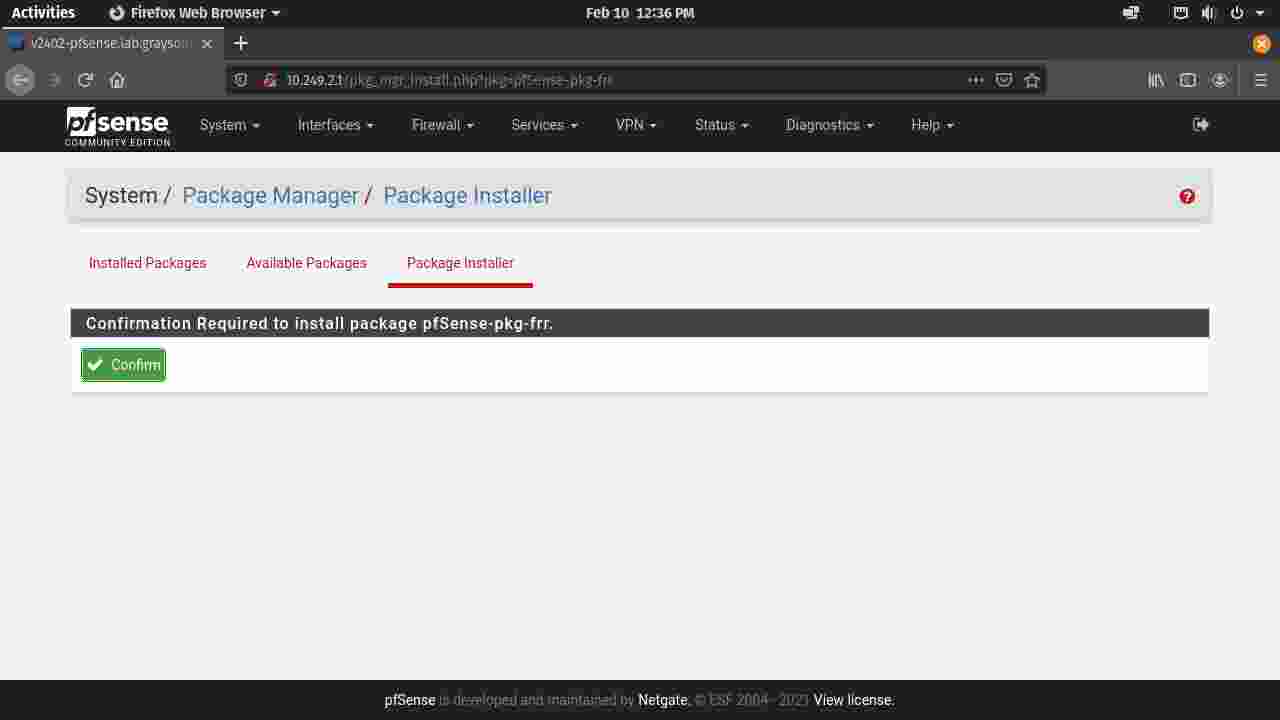
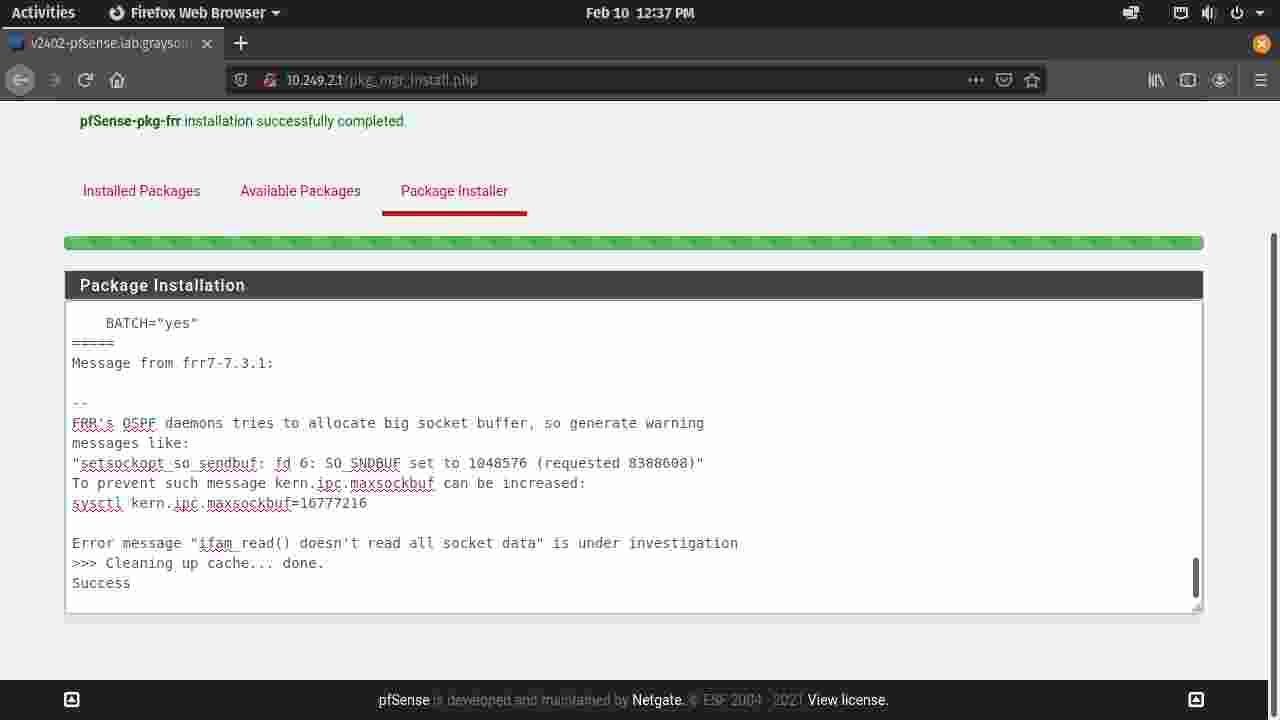
How to Installing FRR Package in pfSense
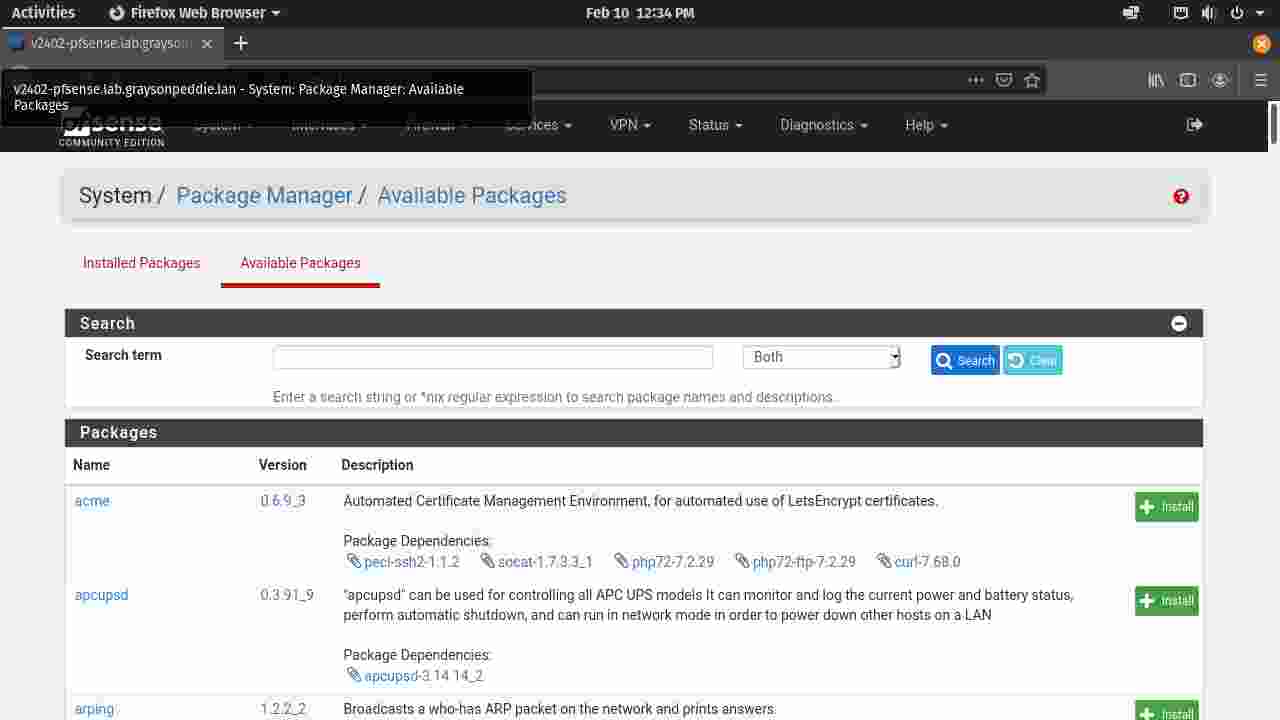
- Go to the Package Manager that is inside the System menu.
- In the Available Packages section, scroll down to frr and click Install. (Figure 1-1, Figure 1-2)
- Confirm the installation of FRR package and the installation should be successful. (Figure 1-3, Figure 1-4)
pfSense Firewall
pfSense must allow OSPF traffic from two VyOS routers. It's important to limit OSPF traffic between pfSense and VyOS routers. Let's configure the firewall before we configure OSPF using FRR.
Images for Firewall Configuration
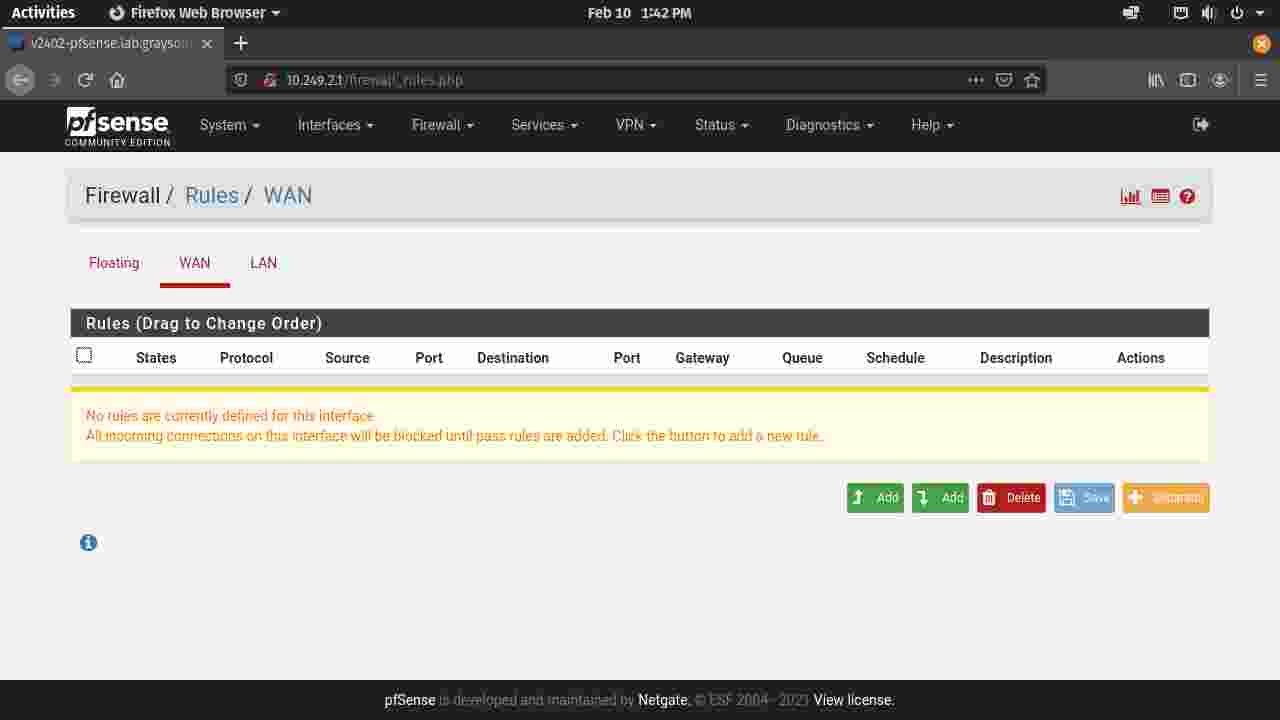
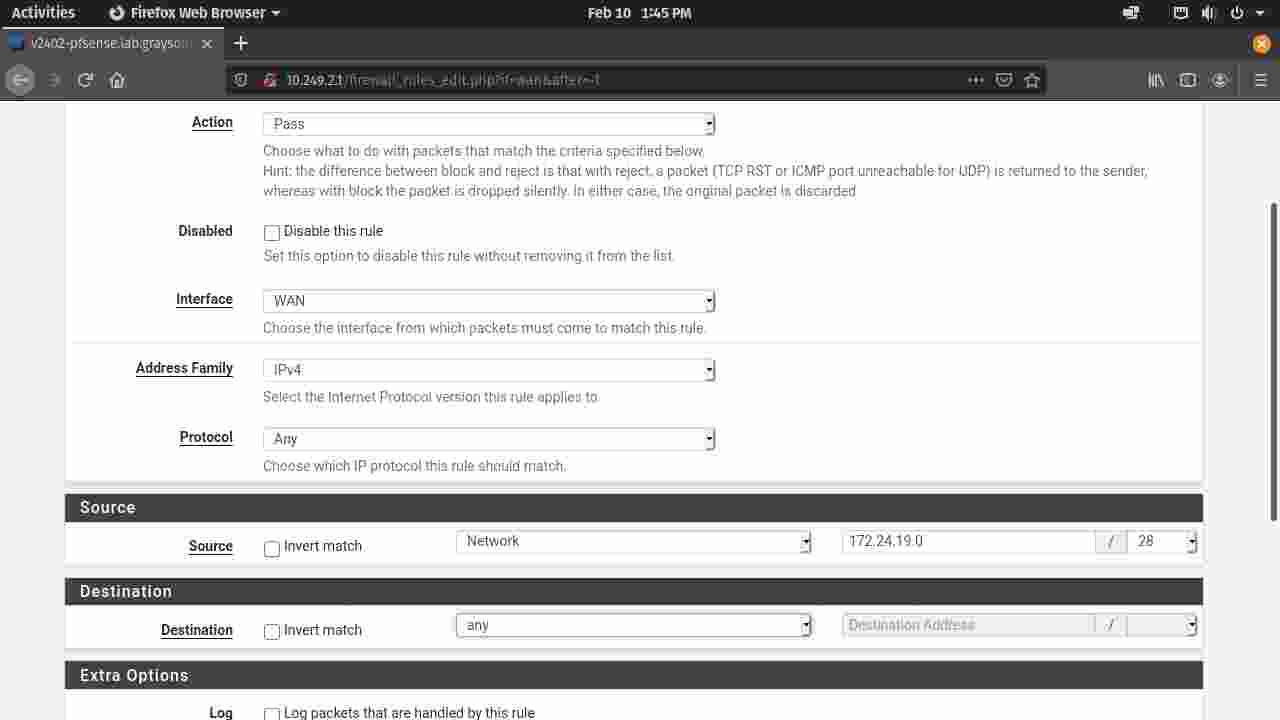

How to Allow OSPF Traffic Through the WAN Firewall
- Open Rules in the Firewall menu. You should be in
Firewall / Rules / WAN. The WAN tab is selected by default. (Figure 1-1) - Click in the Add button (either one) to create a new rule. (Figure 1-1)
- For a new rule, the action is set to Pass by default. Set the Protocol to Any, set the source IP address and subnet mask (remember to limit the subnet for OSPF traffic to pass through), and click Save at the bottom of the page. In my case, I changed the source drop down menu to Network and set the address to
172.24.19.0/28. (Figure 1-2)
The firewall rule configuration is done. (Figure 1-3)
Now Let's Configure OSPF
Images for OSPF Configuration


Instructions for OSPF Configuration
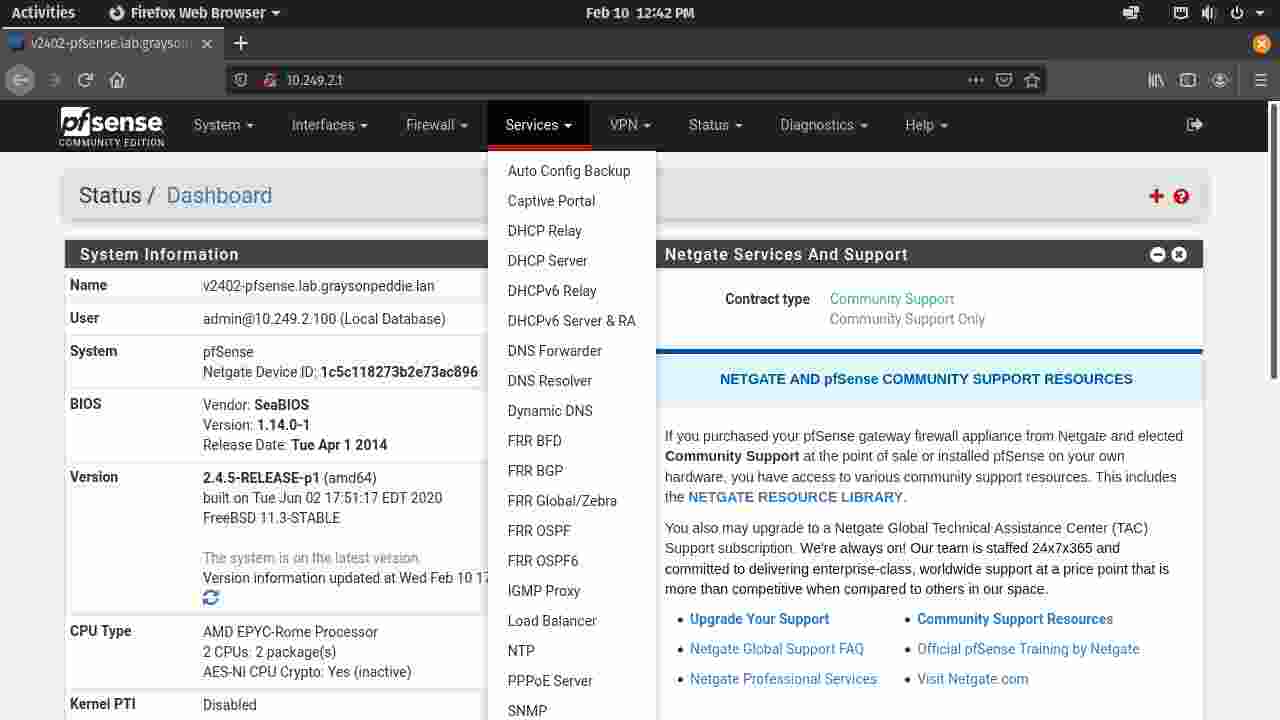
- Under the Services menu, click in FRR Global/Zebra. This will take you to the global configuration page for FRR. (Figure 1-0)
- Check the checkbox for Enable FRR and click Save at the bottom of the page. (Figure 1-1)
- Next, go to the OSPF section and enable OSPF. Specify the Router ID. (Figure 1-2)
Scroll down until you get to specify an area. The area should be the same as configured in VyOS routers. Save changes when done. (Figure 1-3)
Note that there is no need to specify the networks which is marked deprecated. Interfaces need to be specified instead.
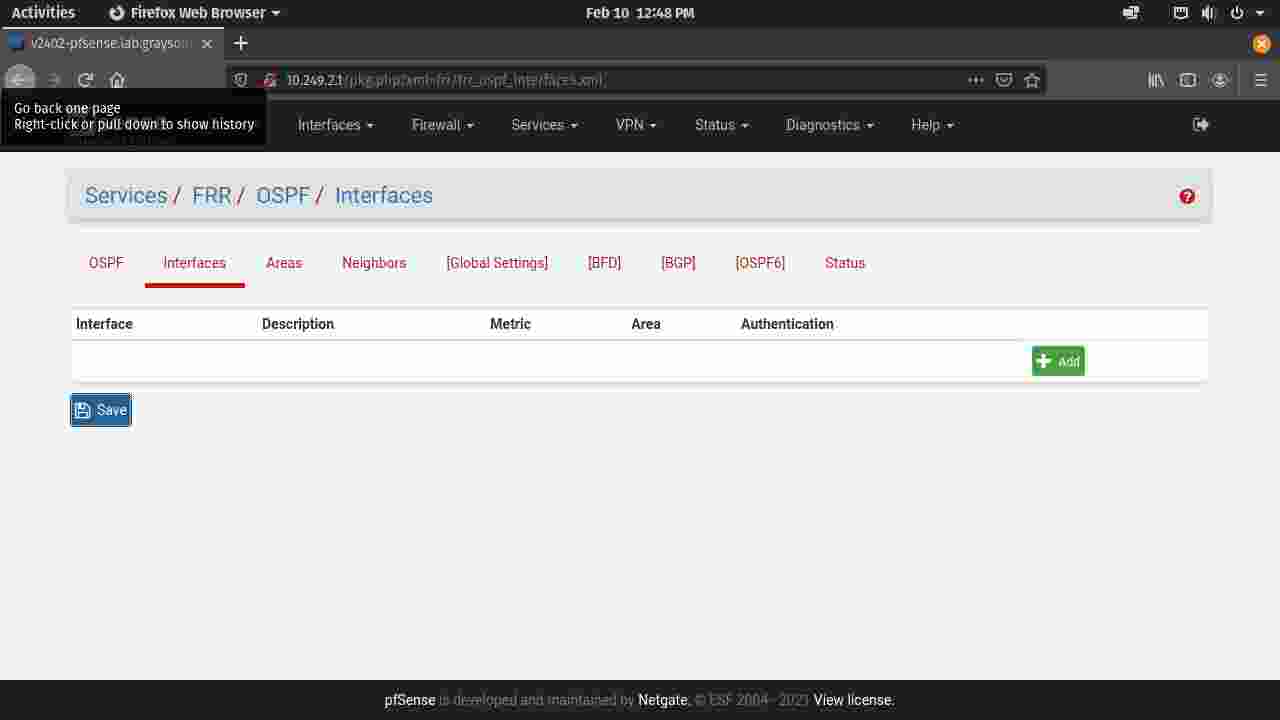
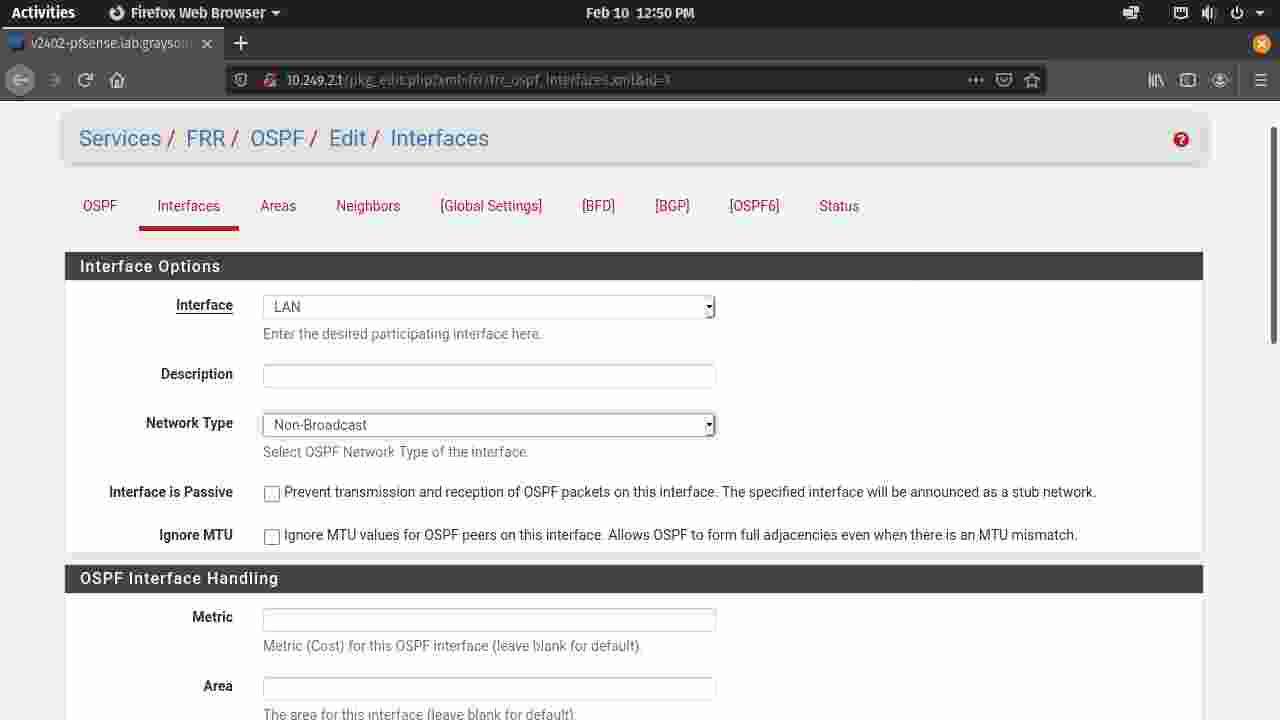
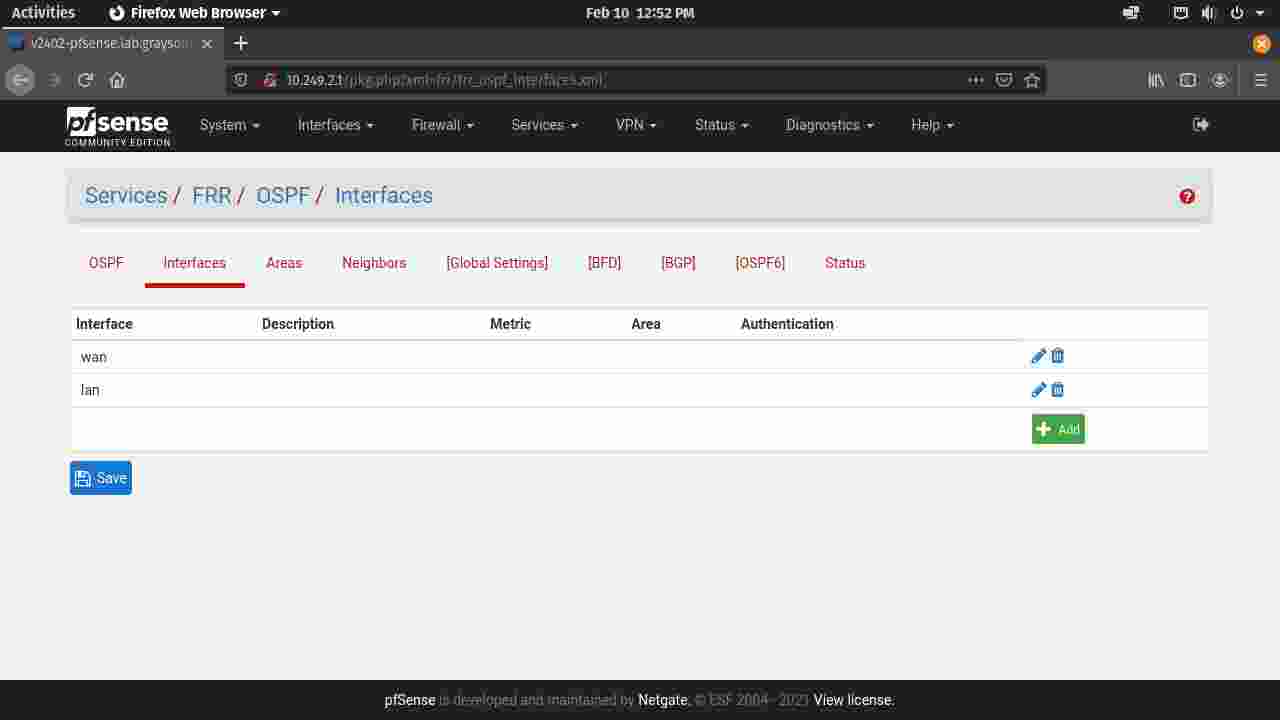
- Go to the Interfaces tab and click Add. (Figure 1-4)
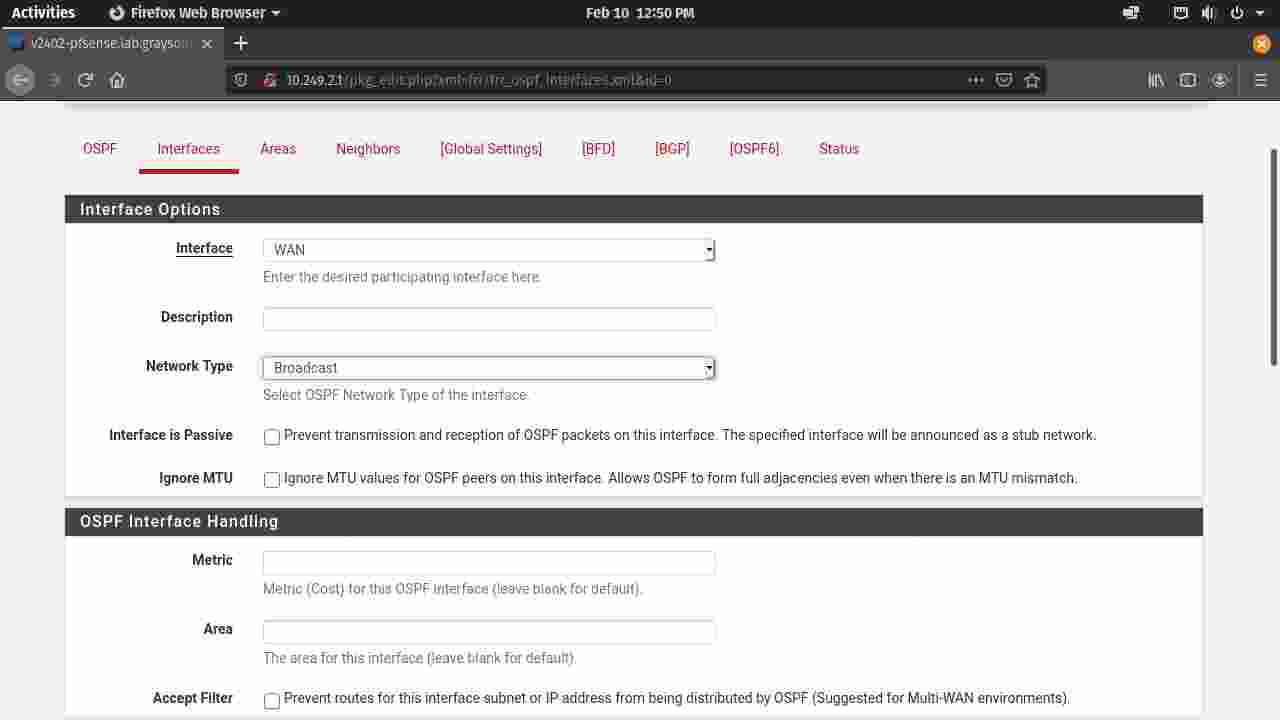
- Set the Interface to WAN, Network Type to Broadcast, and save changes. (Figure 1-5)
- Add another interface for LAN, with Network Type set to Non-Broadcast and save. (Figure 1-6)
- You should have both the WAN and LAN interfaces configured for OSPF. (Figure 1-7)
Can Hosts Behind pfSense Ping Other Hosts in Different Networks?
Now, if you go ahead and start up two hosts from two VyOS networks (one host per network), you should be able to ping a host behind pfSense (In my case, 10.249.2.100). But before we do that, let's check the neighbors.
Let's start with vyos_2400. I'm going to connect to the VyOS router via SSH, issue sh ip ospf neigh, and get the list of neighbors from there.
grayson@v2400-host1:~$ ssh vyos@10.249.0.1
Welcome to VyOS
vyos@10.249.0.1's password:
Last login: Sun Feb 21 21:42:53 2021 from 10.249.0.100
vyos@v2400-vyos:~$ sh ip ospf neigh

Neighbor ID     Pri State           Dead Time Address         Interface                        RXmtL RqstL DBsmL
10.249.1.1        1 Full/DR           34.369s 172.24.19.3     eth0:172.24.19.2                     0     0     0
10.249.2.1        1 Full/DROther      34.372s 172.24.19.4     eth0:172.24.19.2                     0     0     0

vyos@v2400-vyos:~$ exit
logout
Connection to 10.249.0.1 closed.
grayson@v2400-host1:~$
So, my
vyos_2400 router can see pfSense's "public" IP address. Can I ping a host behind pfSense's network?
grayson@v2400-host1:~$ ping 10.249.2.100
PING 10.249.2.100 (10.249.2.100) 56(84) bytes of data.
64 bytes from 10.249.2.100: icmp_seq=1 ttl=62 time=1.22 ms
64 bytes from 10.249.2.100: icmp_seq=2 ttl=62 time=2.09 ms
64 bytes from 10.249.2.100: icmp_seq=3 ttl=62 time=1.20 ms
64 bytes from 10.249.2.100: icmp_seq=4 ttl=62 time=1.90 ms
^C
...
Yes I can! The ^C is for Ctrl+C which terminates the process. What about a host behind vyos_2401? What do the neighbors look like?
grayson@pop-os:~$ ssh vyos@10.249.1.1
Welcome to VyOS
vyos@10.249.1.1's password:
Last login: Wed Feb 10 21:57:29 2021 from 10.249.1.100
vyos@v2401-vyos:~$ sh ip ospf n

Neighbor ID     Pri State           Dead Time Address         Interface                        RXmtL RqstL DBsmL
10.249.0.1        1 Full/Backup       37.358s 172.24.19.2     eth0:172.24.19.3                     0     0     0
10.249.2.1        1 Full/DROther      32.289s 172.24.19.4     eth0:172.24.19.3                     0     0     0

vyos@v2401-vyos:~$ exit
logout
Connection to 10.249.1.1 closed.
grayson@pop-os:~$
Well, I don't see a need for ping as it should work with no problems. But it should work nonetheless.
Okay, so what about a host behind pfSense? Can I ping one of the hosts behind VyOS routers from a host that is behind pfSense? I tried and the answer to that is "no." The reason for that is NAT needs to be configured so that pfSense knows how to return the traffic back to the original host. pfSense needs to translate the original source address (such as 10.249.0.100) back to 10.249.2.0/24, which is the translation address and subnet mask. This is where outbound NAT comes in. Note that hosts behind pfSense can reach the Internet and pfSense will translate the packets back to the WAN interface address, but for private networks via OSPF, this is where the outbound rule needs to be filled in.
Network Address Translation (NAT)
NAT can be found in the Firewall menu. Instead of giving you images, I can provide step-by-step along with the list of settings that need to be configured.
Here are the list of settings that need to be configured.
- Advanced Outbound NAT Entry
- Interface: WAN
- Address Family: IPv4
- Protocol: Any
- Source: Network;
10.249.2.0/24 - Destination: Network;
10.249.0.0/16
- Translation
- Address: Other Subnet (Enter Below)
- Other Subnet:
10.249.2.0/24
Note that your IP addresses may be different depending on how you configure your routers and networks. Adjust accordingly.
Now here's step-by-step instruction on how to configure NAT.
- Once you get to the NAT page that is found under the
Firewall, go to the Outbound section. - In the Mode area, click in Hybrid Outbound and click Save.
- Below the Mappings section, click in the Add button. You will be adding a single rule for OSPF so either buttons do not matter. The order of rules do matter for both firewall and NAT rules.
- Enter the settings I have provided above. If you are using a screen reader, jump to the previous heading level 4 titled Network Address Translation, and jump down to the first list.
- Once you are done configuring the rule from the settings I've provided, save your changes and click Apply at the top of the screen. pfSense will apply the changes.
As I understand it, the "source" field in the NAT rule is for hosts originating behind pfSense and the destination field is for hosts that is behind the two VyOS routers. And the translation address is where pfSense will send the return packets back to the originating hosts behind pfSense. Maybe I could configure the same thing in one of my VyOS routers? Why would I do that while I could simply use masquerade as a translation address? Why is there no such thing as masquerade in pfSense? That's the question I'm going to find out for myself.
So Now Can Hosts Behind pfSense Ping Other Hosts in Different Networks?
With all the settings I have applied for my NAT rule, the host behind pfSense can now ping hosts that are behind VyOS routers. To verify, I have deleted the rule with a translation address of 10.249.2.0/24, and tried pinging hosts behind the VyOS routers. The echo replies did not get sent back to the originating host behind pfSense. I re-added the rule again with the settings from above and pings from other 10.249.0.0/16 networks are now working.
Conclusion
That is all for part 2 out of 2 for this article! The hosts between pfSense and VyOS routers can ping each other once OSPF has been configured! If you enjoyed my article, can you please share your feedback with me in Twitter and LinkedIn? I will provide links so you can comment in my article. Thank you for reading my article. I've been writing an article since February 10th and stopped since the 14th as I've been busy with my studies during the last two weeks and until the 21st of this month. Happy networking! Have fun!
Revisions
- Version 1.00: Initial Publish
- Version 1.01: Updated the figures for the pfSense's setup wizard and OSPF configuration.
Article published: 2021-02-25 00:14
Categories: The World of Computers, Networking,